Description
Timelapse
Overview
Automatically record a timelapse of your prints — one frame captured every layer change, assembled into an MP4 the moment the print finishes. Works with the printer's built-in camera, a USB/v4l2 webcam, or a camera from the IP Camera plugin, so you're not limited to whatever's already streaming live view.
What it does
- Arm it right from the Print dialog — clicking Print asks "Print only" or "Print + Timelapse", no extra steps beforehand.
- Captures a frame automatically every time the layer number advances — nothing to trigger manually during the print.
- Three camera sources: the printer's built-in RTSP camera, a USB/v4l2 webcam plugged into the host, or a camera already configured in the IP Camera plugin.
- Assembles the video automatically when the print completes, using ffmpeg for best quality (falls back to OpenCV if ffmpeg isn't installed).
- Configurable output FPS (1–120) and encoding preset, to trade off render speed against file size.
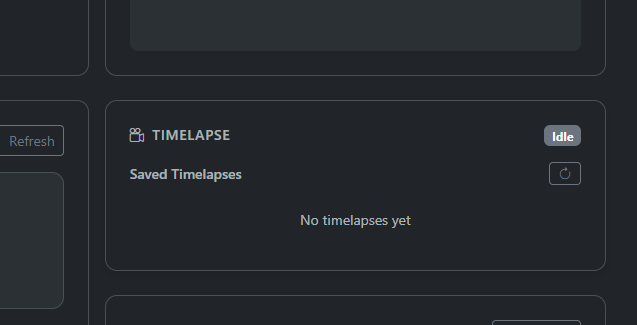
- Sidebar card shows live status — recording, frame count, current/total layer, assembling — plus a list of saved timelapses you can download or delete.
In ChitUI
Every time you click Print, a dialog asks whether to record a timelapse for that job. Choose Print + Timelapse and recording starts automatically once the print begins — no need to remember to arm it in advance. The sidebar card tracks progress live: a red "Recording" badge with frame count and current/total layer while it's capturing, a spinner while the video is being assembled, and the finished MP4 appearing in the Saved Timelapses list moments later, ready to download or delete.
How to Configure It
1. Open the plugin's settings.
2. Under Camera Source, pick one:
- System Camera — uses the printer's built-in RTSP stream, auto-detected from its IP address. No further setup needed.
- USB Camera — click Detect to scan for USB/v4l2 devices attached to the machine running ChitUI, then pick one from the list.
- IP Camera — pick a camera from the ones already configured in the IP Camera plugin.
3. Set the Output FPS (1–120) and Encoding Preset for the assembled video — faster presets encode quicker but produce larger files, slower presets do the opposite.
4. (Optional) Set a Custom Storage Directory for finished videos. Leave it blank to use the default (~/timelapse).
5. Click Save Changes.
Note:
- Timelapse recording is chosen per print, from the Print dialog — the settings above only control camera source and video output, not whether a given print is recorded.
- If the printer's live camera view is already streaming when a recording starts, Timelapse reuses that same stream; otherwise it starts the camera itself for the duration of the print and stops it again afterward.
Good to Know
- ffmpeg produces the best quality and most compatible MP4s. If it's not installed, the plugin falls back to OpenCV, which works but tends to produce larger, less compatible files.
- One frame is captured per layer, so total video length depends on the number of layers, not the print's real-world duration — a 3-layer print won't produce a usable clip (at least 2 captured frames are required to assemble a video).
- USB camera detection scans device indices 0–9 and can take a few seconds to complete.
- Switching camera source in settings doesn't affect what's used for the live camera view elsewhere in ChitUI — the two are independent.
- Finished videos are stored as plain .mp4 files on disk in the configured storage directory, so they're easy to back up or move manually if needed.
ChitUI - Timelapse
Timelapse system for Elegoo printers